cPanel - Softaculous - Remote Backup
Protecting your web applications goes beyond local storage. Softaculous provides a robust remote backup system that lets you store copies of your installations on external servers using protocols like FTP or popular cloud services. This offsite approach significantly reduces the risk of data loss from hardware failure, accidental deletion, or server issues. Whether you're managing one site or dozens, configuring and maintaining remote backup locations ensures reliable recovery options. This detailed guide walks through every aspect of the feature.
Core Features and Benefits
Remote backups integrate smoothly into the Softaculous enduser panel, offering flexibility and security. You can create multiple locations, customize paths, and rely on intelligent fallback rules to maintain continuity even if a location becomes unavailable.
- Multiple remote locations for flexible assignment to different installations.
- Support for FTP protocol with custom host, port, credentials, and relative paths.
- Cloud service integration including Dropbox for seamless cloud storage.
- Default location fallback to prevent backup failures when no specific location is set.
- Automatic reassignment of installations when a location is deleted.
- Easy assignment during new script installs or for already existing setups.
Add a Remote Backup Location
Log into your cPanel
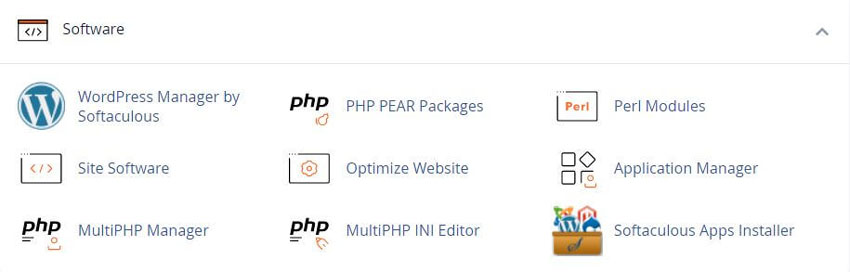
Click the Softaculous App Installer link in the Software section.
Next, open the Softaculous Enduser dashboard and navigate to the Edit Settings section.
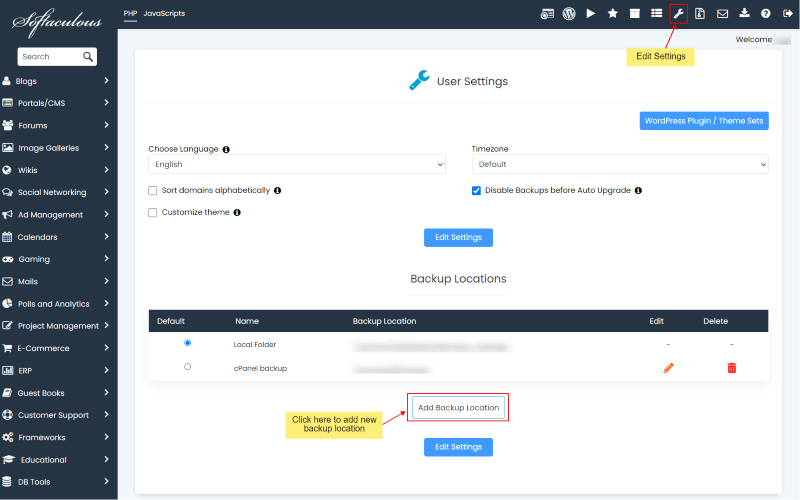
- 1) In the Softaculous Enduser panel, click Edit Settings and then select Add Backup Location.
- 2) Enter the required information for the remote backup server and click Add Backup Location to store the configuration.
- The following fields are used to define the backup destination:
- Location Name : Assign a recognizable name to this backup location for easy identification.
- Server Host : Specify the hostname of the server where backups will be saved, such as ftp.yourdomain.com.
- Protocol : Choose the communication method Softaculous will use to connect to the remote server. The default option is FTP.
- Port : Provide the connection port number. Standard FTP connections typically use port 21.
- FTP Username : Enter the username associated with your FTP account.
- FTP Password : Input the corresponding password for the FTP account.
- Backup Location : Define the directory path, relative to the FTP user’s root folder, where backups should be stored, for example /backups.
If you prefer storing backups in the cloud, Softaculous offers direct integration with Dropbox, enabling automated backups without the need for FTP configuration.
- 1) Open your Softaculous Enduser panel, go to Edit Settings, and click on Add Backup Location.
- 2) From the Protocol dropdown, choose Dropbox and enter a descriptive backup name.
- 3) Click the Authorize button to begin linking your Dropbox account with Softaculous. You will be redirected through several Dropbox authorization screens.
- 4) Log in using your Dropbox account credentials when prompted.
- 5) Dropbox will then ask whether you want to grant access to the Softaculous Auto Installer application.
- 6) After clicking Allow, Dropbox will display an authorization code. Copy this code and paste it into the Auth Code field in the Softaculous Add Backup Location form.
- 7) Backup Location (Optional): You may define a specific subdirectory within the Softaculous App folder, such as /wordpress. If no path is entered, backups will be saved to the default Softaculous directory.
- 8) Click the Add Backup Location button to complete the setup.
Configuring Google Drive Backup Location
Google Drive can also be used as a remote backup destination in Softaculous, providing a simple and secure cloud-based storage option.
- 1) Navigate to Softaculous Enduser, select Edit Settings, and click Add Backup Location.
- 2) Choose Google Drive as the Protocol, then enter the location name and desired backup directory.
- 3) Submit the form by clicking the Add Backup Location button.
- 4) You will be redirected to Google’s authorization page where you must sign in to your Google Drive account.
- 5) Google will ask for permission to allow the Softaculous Auto Installer to access your Drive. Confirm access to continue.
- 6) Once authorization is complete, you will be redirected back to Softaculous, where the Google Drive backup location will appear as successfully added.
That’s it - your Google Drive backup destination is now ready for use.
Configuring Amazon S3 Backup Location
Amazon S3 provides a powerful and scalable solution for storing Softaculous backups, suitable for users who require advanced cloud storage capabilities.
- 1) Access the Softaculous Enduser panel, go to Edit Settings, and click Add Backup Location.
- 2) Enter a Location Name to help identify this backup destination.
- 3) Select Amazon S3 as the Protocol from the dropdown list.
- 4) Provide your AWS S3 Endpoint, such as “s3.us-east-1.amazonaws.com”. More details can be found at https://docs.aws.amazon.com/general/latest/gr/s3.html
- 5) Enter your AWS S3 Region, for example “us-east-1”. Additional region information is available at https://docs.aws.amazon.com/general/latest/gr/s3.html
- 6) Input your AWS S3 Access Key, which is used to authenticate your connection to Amazon S3.
- 7) Enter your AWS S3 Secret Key to complete the authentication details.
- 8) Specify the AWS S3 Bucket Name where Softaculous should store backups. If the bucket does not already exist, it will be created automatically.
- 9) Backup Location: Define the directory path where backups should be saved, such as /backups.
- 10) Click the Add Backup Location button to finalize the configuration.
- 11) After adding the location, you can select this destination when creating backups from the Backup page.
Deleting Locations and Setting a Default
When a location is no longer needed, select the Delete icon next to it in Edit Settings. Softaculous automatically reassigns any linked installations to your chosen default location. Should the default also be removed, backups revert safely to the local server, ensuring nothing is lost.
To establish or change the default, return to Edit Settings, select the preferred location using the radio button, and save via Edit Settings. This default acts as an automatic safety net for any installation without a specific remote assignment.
Assigning Locations to Installations
For new scripts, open the Install tab, expand Advanced Options, and pick your remote location from the dropdown before completing setup. Existing installations follow a similar path: click the Edit icon for the installation, locate the Backup Location field, choose the desired option, and save with Edit Installation. Future backups will now route securely to the remote server.
Regularly verify connections and test restores to confirm everything functions as expected. By mastering these steps, you build a resilient backup strategy that safeguards your online assets effectively.
Implementing remote backups through Softaculous transforms basic data protection into a professional-grade solution. With intuitive tools for addition, modification, deletion, defaults, assignment, and cloud integrations like Dropbox, maintaining offsite copies becomes straightforward and reliable.
Related Softaculous Tutorials and How To Guides
Wide range of key features for website management

Related Softaculous Tutorials and How To Guides
Wide range of key features for website management
Softaculous End-user Documentation
See our WHMCS cPanel Knowledgebase add-on module for Hosting Companies
Covering cPanel, WordPress, FTP and Softaculous
Related cPanel Tutorials and How To Guides
A beginners guide to cPanel Step by step tutorials
Tweet Share Pin Email
Add Comment
This policy contains information about your privacy. By posting, you are declaring that you understand this policy:
- Your name, rating, website address, town, country, state and comment will be publicly displayed if entered.
- Aside from the data entered into these form fields, other stored data about your comment will include:
- Your IP address (not displayed)
- The time/date of your submission (displayed)
- Your email address will not be shared. It is collected for only two reasons:
- Administrative purposes, should a need to contact you arise.
- To inform you of new comments, should you subscribe to receive notifications.
- A cookie may be set on your computer. This is used to remember your inputs. It will expire by itself.
This policy is subject to change at any time and without notice.
These terms and conditions contain rules about posting comments. By submitting a comment, you agree with these rules:
- Although the administrator will attempt to moderate comments, not all comments can be moderated at all times.
- You acknowledge that all comments express the opinions of the original author and not those of the administrator.
- You will not post material which is knowingly false, obscene, hateful, threatening, harassing or invasive of privacy.
- The administrator has the right to edit, move or remove any comment for any reason and without notice.
Failure to comply with these rules may result in being banned from submitting further comments.
These terms and conditions are subject to change at any time and without notice.
 Compliance - Cybersecurity: What Every Business Needs to Know
 Brand Building in the Digital Age: Effective Strategies & Tools
 The Importance of Having a Website for your Small Business
 Career Advancement Through Assistive Technologies
Comments