CPANEL TUTORIALS & GUIDES
cPanel is a Web based control panel where you can manage almost everything with your Website.
With more than 75 different features See Menu on left side
RSH Web has made cPanel available to all of our customers. It is a simple and easy to use dashboard. It is maintained with regular updates, improvements, and security measures
See What is cPanel.
With cPanel, you will be able to connect domain names to your hosting account. Set up email accounts for your users. Install WordPress or other Content Management Systems. Back up your Website. Upload files and images. Check the Bandwidth and other usage stats. Change different security settings. Install add on applications
This playlist includes videos to help new cPanel users take the first steps in their cPanel accounts. All of these videos also appear in the cPanel Tutorials playlist.
This playlist includes videos on the following topics:
This playlist includes videos to help new and experienced cPanel users manage their cPanel accounts’ features successfully.
This playlist includes videos on the following topics:
Log into your cPanel with the supplied URL and enter your cPanel username and password.
Note: If you encounter problems accessing your website and cPanel see Inaccessible Website
If you need more help, there is documentation available on every page within cPanel itself. Usually listed along the top. For example:
Once you have logged in, you should see a screen similar to this
This is the newest version of cPanel. It is a theme called Jupiter.
The navigation bar is in the top right corner of the screen. There is a simple search field. A link to your user preferences. A notification bell and the logout link.

The search field allows you to find the key options within cPanel. The search field can be a quicker way to navigate around cPanel.
With the user preferences link you can change your password, language, edit your Contact Information, and you can also reset the page settings with one click
The notifications bell is a place where you can see updates about your hosting setup. Messages from RSH Web Services.
The logout link is self-explanatory. Remember, for security reasons, always log out every time you are finished working with cPanel.
You can collapse sections by clicking on the up or down arrow in the top right corner of each homepage section to minimize it.
You can also drag and drop entire sections to reorganize and put the most commonly used ones near the top.
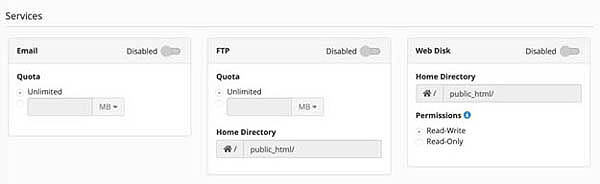
Email allows you to enable or disable email accounts for the user and set a limit for how much space each email account can have
FTP allows you to enable or disable users from being able to access your hosting setup via FTP. You can choose what directory the new user will have access to and limit the space they can use
Web Disk permissions should be reserved for your Top Level Admin accounts only. Read Write level access gives the user full permissions to do pretty much whatever they wish within the specified directory (including deleting files) "Read Only", only permits reading, downloading and listing files.
The Domain's section of cPanel is where you can add a domain name, manage your existing domains, set up Subdomains, add simple web pages for your Domains
Also see our cPanel FAQ on Adding a New Domain Name.
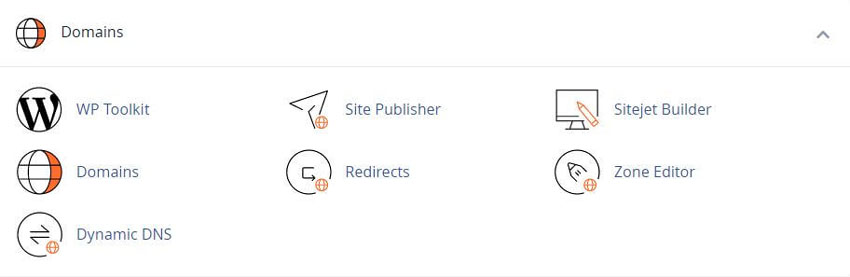
To add a domain name to your cPanel, click on Add-on Domains.
An add-on domain is another name for a standard domain name that you can use to create a fully functional website. With this, you can host multiple domain names from the same control panel.
On the Add-on Domains screen, you will be asked to enter your new domain name plus a couple of other settings.
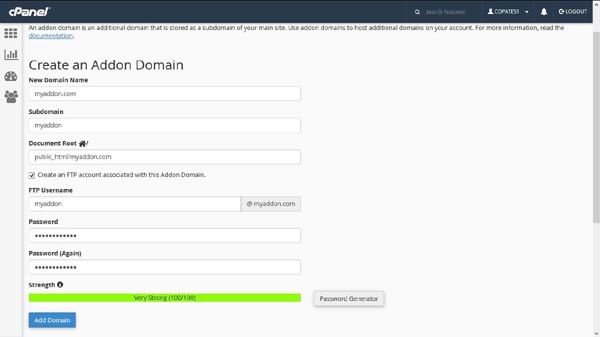
New Domain Name. The exact domain name that you have already registered
NOTE: The prefix of "WWW". You often see this in association with domain names, are not actually part of a domain. Do not add the www when working with domains
Subdomain. This will be filled out automatically as soon as you enter your new domain name into the field above. cPanel will use this for internal routing
Document Root. The location on the server where your new domain's files will be. This is filled out automatically. You can change this to what is needed
Click on Add Domain to finish.
One of the best options about a cPanel enabled Website is that you can create custom email accounts for your Domain Name.
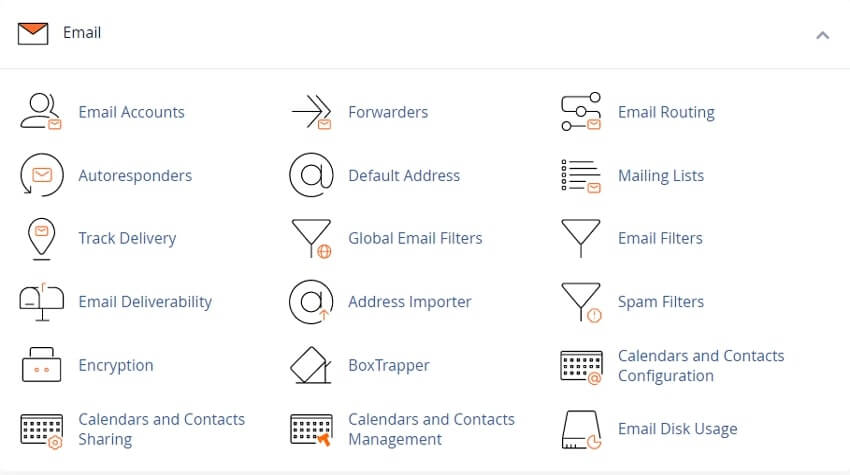
Here you can create new emails, email forwarders, autoresponders, control Spam and more
See our cPanel FAQ on Creating Email Accounts.
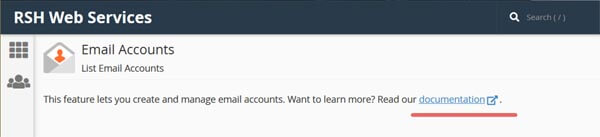
To add a new email account, click on Email Accounts. You will see the following screen: Add Email Account.
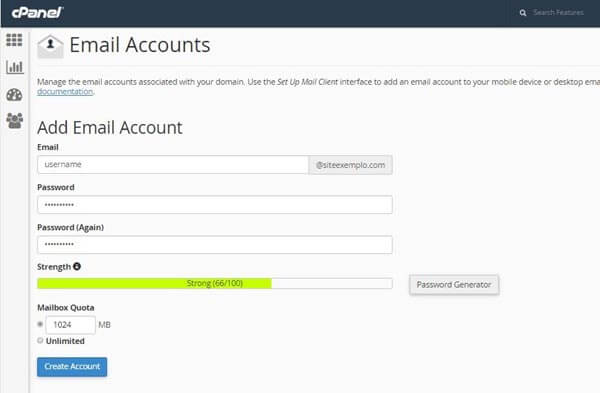
Email Enter the use name. Example admin or your_name
Domain Select the Domain from the drop-down box
Password: Create a good password
Mailbox Quota: Set the size of the mailbox storage
NOTE. Emails take up space on your Website. You may not want to give everyone unlimited access. However, .5 GB (=500MB) is a reasonable amount.
You will see that the email you just created has been added to the list of the existing email accounts in the Email Accounts tab.
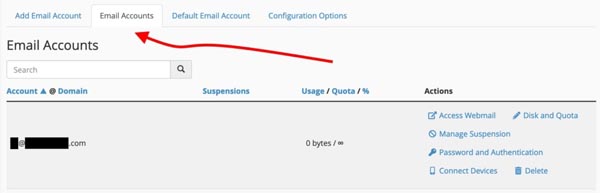
You can manage every element of that including the password, quota, and other details.
After you set up an email account, you have two main options:
1) Configure the Email in an email client like Gmail, Apple Mail, Outlook, etc.
2) Use Webmail
Configure Your Email Locally
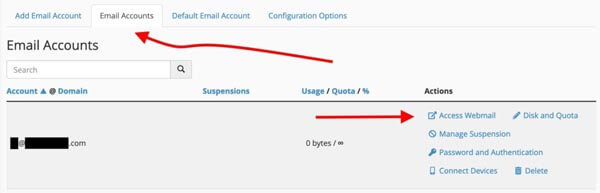
Click on the Access Webmail link that is visible next to your address in the Email Accounts tab.
This will take you to a new panel. Scroll down to the section labeled Mail Client Automatic Configuration Scripts. You should see something like this.
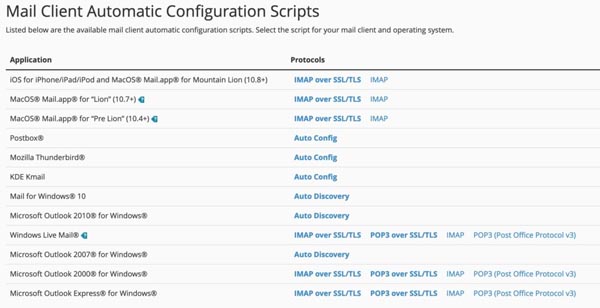
There are some links there with either instructions or ready-made configuration scripts for some of the most popular Email Clients. If yours is listed, click on the link, and finish the configuration according to the advice given.
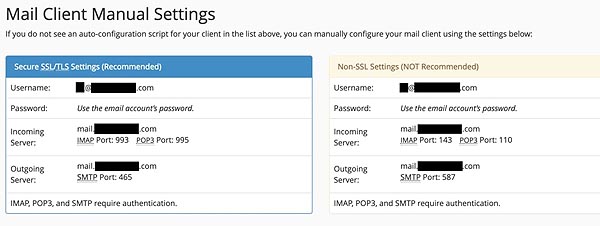
If you do not see your client, or you want to configure your email manually, then below this section is another one labeled Mail Client Manual Settings.
Click on the Access Webmail link next to your address in the Email Accounts tab.
Next click on one of the available webmail clients, you can also install a different one through Softaculous. The one we like is RainLoop Webmail.
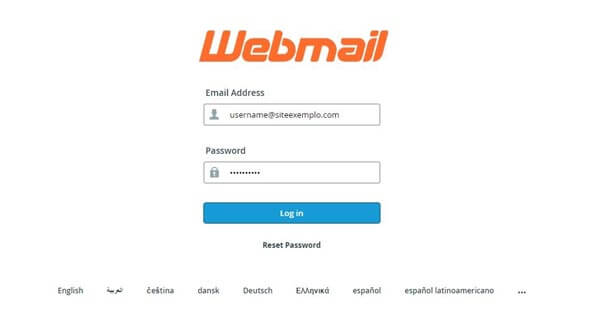
You can also access your Webmail straight from a web browser. Simply navigate to YOURDOMAIN webmail, and you will be greeted by this screen.
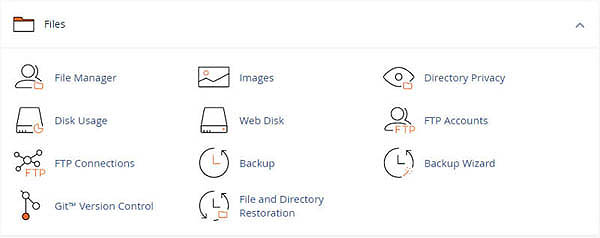
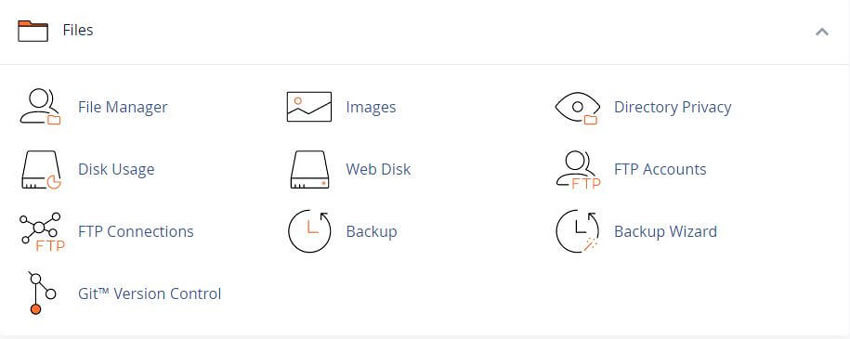
The |FILES| section of cPanel is for Uploading Files, backing up your website and managing your files via FTP.
You can use a FTP program to manage the files within your website.
Or you can use the File Manger explained below
You will be able to log in to a FTP program using the same cPanel login and pass
To check this, click on |FTP Accounts| from the FILES section. Scroll down to Special FTP Accounts. Your main FTP account should be listed there.

By default, your main FTP account will have access to the root folder, so when Uploading Files make sure you move into the WWW or /home/user_name/public_html folder
Also see What is FTP
The File Manager allows you to manage all of your sites files directly from within the cPanel interface, rather than having to use a third party FTP Client.
Click on the File Manager icon (visible in the above screenshot) to begin. What you will see is the central panel of the File Manager.
See The File Manager.
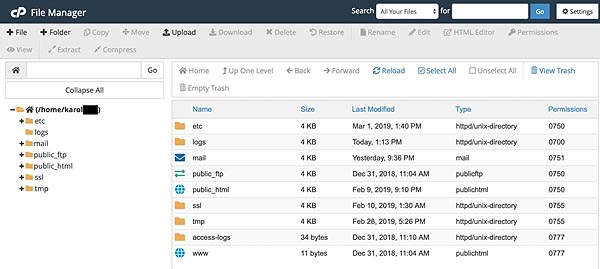
This is where you can view, edit, delete all the files on your Website, You WILL want to proceed with EXTREME caution when making any changes
There are a couple of items to point out on this section. On the left you will find your root (main) folder and some sub folders (see screenshot above)
In the middle of the screen, you will see the contents of whatever folder you have selected.
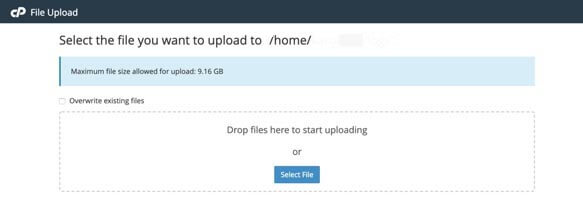
To add or upload a file, click on the folder where you want to upload the file to.
Then click on the Upload button that is in the top menu.

You will be asked to drag and drop the file you want to upload or simply select the file from your local drive. You may have to refresh the page and your website page to see the new files.
One of the best features in cPanel is how to install WordPress and other useful programs or apps. This will give you access to more than 350 Apps
See our cPanel FAQ on Softaculous Application Installer.
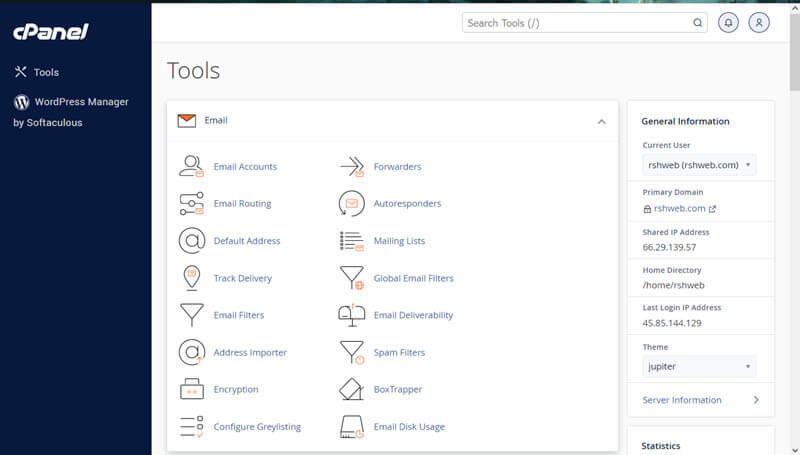
Locate the Softaculous Apps Installer section in your cPanel.
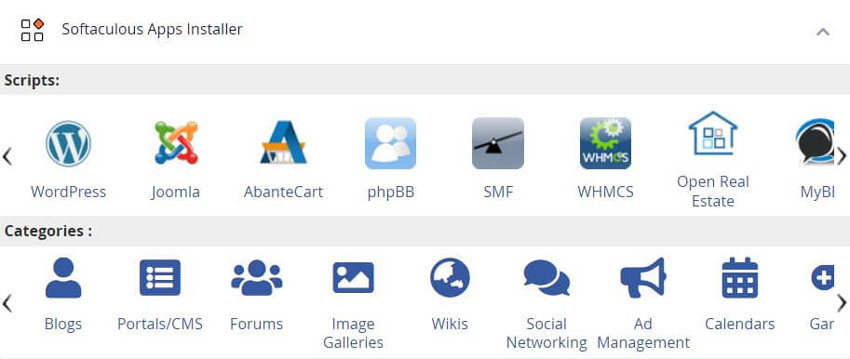
Softaculous has tried to add every web app that is available. On the sidebar there are installers for blogs, microblogs, forums, wikis, ecommerce, and so much more.
Look around, see what is available. It is amazing.
We will use WordPress as our example. You will see the WordPress logo. Click on it.
You will see a screen like this.
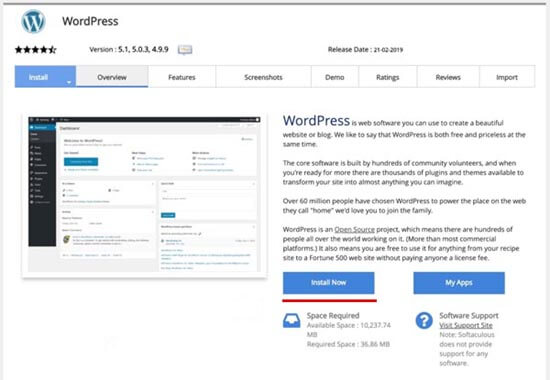
Click the blue Install Now button to begin. Softaculous will show you the following form:
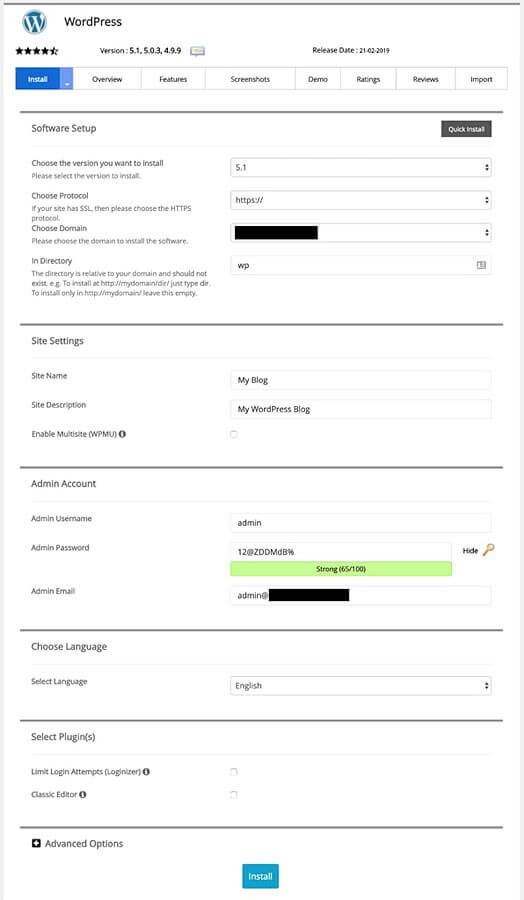
The Software Setup section: This will apply to all other apps also
Choose the version: It is recommended to always go for the latest available one
Choose Protocol: Best to pick HTTPS if available. This allows you to integrate your site with an SSL certificate. If not, HTTP will work.
Choose the Domain: This is the domain name that you want to add WordPress. Pick from the drop-down list
Directory: Leave this empty if you are adding WordPress to your domain root. If you want it to be available as a blog to an already existing site, you may want to set the directory to something like blog or WordPress
The Site Settings section:
Site Name: Enter a name that reflects what your site is called. You can change this later on from within WordPress itself
Site Description: You can leave this blank for now. You can adjust this setting from within WordPress later
Enable Multi site: Leave unchecked. This is a feature useful only if you are planning to run more than one WordPress installation on the same domain. In a multi-site configuration
The Admin Account section:
Admin Username: This one is important. It is ok to leave the admin name as admin. You might want to change it to something more complex
Admin Password: Make SURE you use a very strong password consisting of letters, numbers, characters, and capitals. The installer can also suggest a secure password for you
Admin Email: Double check if this is correct
The Select Plugins section:
This one is optional. If you want to, you can install some handy plugins right from Softaculous. You can install plugins later on very easily
The Advanced Options section:
No need to bother with any of the advanced options just yet
The Select Theme section:
You might also see the option to pick a WordPress theme to be installed on your site right out of the gate
You do not need to bother with that now, it is actually easier to do later on once your WordPress has been fully installed
Once done with above options, click on Install to get the installation finalized.
After a few seconds, Softaculous will let you know that your WordPress has been installed successfully. You will also see links that you can use to log in to your new installation.
Tweet Share Pin Email
This policy contains information about your privacy. By posting, you are declaring that you understand this policy:
This policy is subject to change at any time and without notice.
These terms and conditions contain rules about posting comments. By submitting a comment, you agree with these rules:
Failure to comply with these rules may result in being banned from submitting further comments.
These terms and conditions are subject to change at any time and without notice.
 What Is an SSL Certificate? How It Works & Why It Matters
 Why You Should Make The Switch to HTTPS
 The Different SSL Security Certificates
 Protecting Your Website From Cyberattacks
Comments