cPanel - Domains - Domains
A domain name is an easy-to-remember name that is associated with an IP address on the Internet. It is the unique name that appears after the @ sign in email addresses, and if used after the WWW in website addresses.
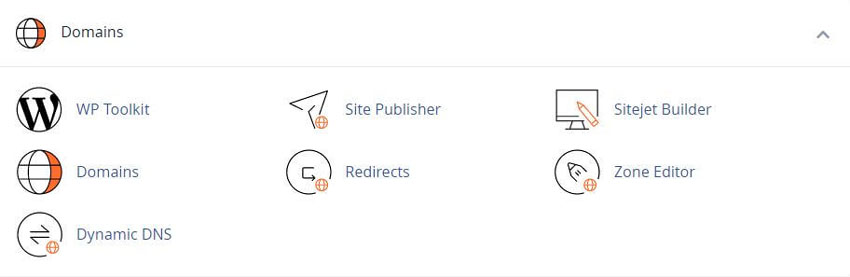
With this cPanel interface you can create or manage all your domain names from one place
Add a New Domain to Your Hosting Account
First, make sure the desired Domain is using RSH Web Services DNS or Name Servers
ns1.rshweb.biz
ns2.rshweb.biz
To Add a New Domain Name
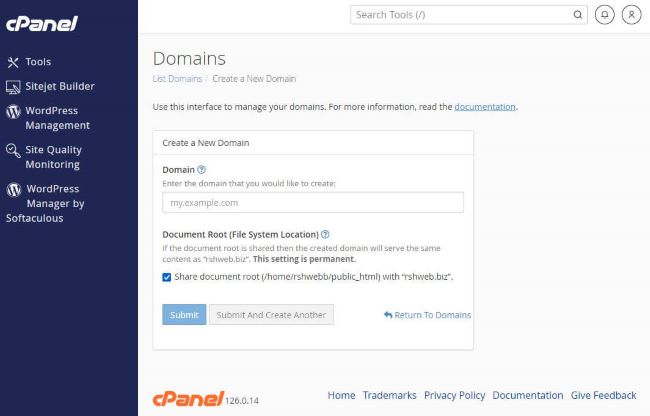
Click Create a New Domain. A new interface will appear.
Enter a fully qualified domain name including extension in the Domain text box.
For example: "example.com"
To Create a Subdomain
Just as adding a new domain. Enter the new name (Subdomain) followed by a period (.) and then the website’s Domain Name.
For example, enter "subdomain.example.com" to create a subdomain of example.com.
Optionally, you can specify the directory where you want the files for the "Subdomain" to exist (the domain’s document root).
To create this directory, deselect the "Share Document Root" with “example.com” checkbox, where example.com represents your main domain name.
You can now go ahead and upload content for your new domain name into the corresponding document root either with the File Manager or a FTP program
To Create an Addon or Aliases Domain Name
To create an addon or aliases domain, perform the following steps:
Enter the new addon domain’s name in the New Domain Name text box.
When you enter the domain name, cPanel automatically populates the Subdomain and Document Root text boxes.
Force HTTPS Redirect
To automatically redirect the new domain’s visitors from the insecure version of the website to the secure version, set the Force HTTPS Redirect toggle to On.
Click Submit or click Submit and Create Another Domain.
List Domains
This interface lists your domain names.
Domain
Click Domain to sort the list alphabetically by account name.
Click an individual domain name to visit the public-facing website.
Note: The Main Domain label identifies the domain that your hosting provider listed to create this account
Document Root
Click Document Root to sort the list alphabetically by relative directory paths.
Click the home icon () or the file path to navigate to the File Manager interface for that domain. A new interface will appear.
Note: This interface displays an unlinked file path if your hosting provider disables the File Manager interface
For more information, contact your hosting provider
Redirects To - If the listed domain name Redirects to a different domain, the destination will appear here. Click a domain to visit the public-facing website. A new tab will appear.
Note: To manage redirects, navigate to the Redirects interface
Actions
Manage
To manage additional settings, click Manage. A new interface will appear.
Create Email
To create email addresses for the domain, click Create Email. The Email Accounts interface will appear.
Show Associated Subdomains
To show Subdomains that the system automatically creates, perform the following steps:
• Click the gear icon.
• Click Show Associated Domains.
Note: This setting is only available if an addon domain name exists
Manage
Note: These settings only appear if your hosting provider enables them
Use the Manage the Domain interface to manage the domain’s document root directory, remove the domain name, or perform other actions. From the Additional Resources menu, you can select the following actions to perform in a new browser tab:
• Create an Email Account - Add an email address to the website.
• Create a Site with SiteJet: AI Website Builder: - Create complete websites directly from cPanel
• Modify the Zones - Create, edit, and delete Domain Name System (DNS) records.
• Modify the Redirects - Send all the visitors of a domain or particular page to a different URL.
New document root
The domain’s document root directory defines the domain name’s directory relative to the cPanel account’s home directory.
For example, enter newdomain.com in the New Document Root text box for a cPanel account that uses the /home/username home directory. That domain’s files will reside in the /home/username/public_html/newdomain.com directory.
Note: This setting only appears if your hosting provider enables it.
This action changes the directory where the server searches for your files. It does not rearrange your files in any way.
You cannot modify the document root directory for domains that share that directory with the main domain
To provide a new document root directory, perform the following steps:
• Enter a new path, relative to the user’s home directory.
• Click Update.
Remove Domains
• To remove the domain from the cPanel account, perform the following steps:
• Click Remove Domain.
• To confirm that you wish to remove this domain, click Yes, remove this domain.
Note: We strongly recommend that you create a full account backup before you remove a domain.
This action only removes the domain’s vhost entries and DNS entries. The server retains the domain’s directory and contents.
You cannot delete the main domain
If you remove a domain that contains Email Accounts, those email accounts will not appear in the Email Accounts interface
However, the mail folders continue to exist on the server. If you add the domain again, the email accounts will reappear.
Domain Name Articles
Domains for Sports Related Sites
Domains for Financial Companies
Watch our video about cPanel Hosting Services on YouTube
Related cPanel Tutorials and How To Guides
Over 75 different website hosting features available
Tweet Share Pin Email
Add Comment
This policy contains information about your privacy. By posting, you are declaring that you understand this policy:
- Your name, rating, website address, town, country, state and comment will be publicly displayed if entered.
- Aside from the data entered into these form fields, other stored data about your comment will include:
- Your IP address (not displayed)
- The time/date of your submission (displayed)
- Your email address will not be shared. It is collected for only two reasons:
- Administrative purposes, should a need to contact you arise.
- To inform you of new comments, should you subscribe to receive notifications.
- A cookie may be set on your computer. This is used to remember your inputs. It will expire by itself.
This policy is subject to change at any time and without notice.
These terms and conditions contain rules about posting comments. By submitting a comment, you agree with these rules:
- Although the administrator will attempt to moderate comments, not all comments can be moderated at all times.
- You acknowledge that all comments express the opinions of the original author and not those of the administrator.
- You will not post material which is knowingly false, obscene, hateful, threatening, harassing or invasive of privacy.
- The administrator has the right to edit, move or remove any comment for any reason and without notice.
Failure to comply with these rules may result in being banned from submitting further comments.
These terms and conditions are subject to change at any time and without notice.
 Why Do I Need A Secure HTTPS Website
 The Best WordPress Learning Resources
 Common Business Blogging Mistakes To Avoid
 My Domain Name is taken - What can I do
Comments