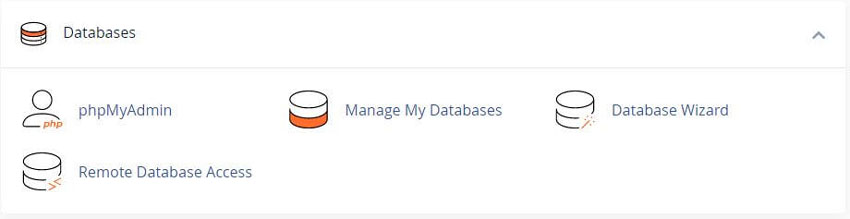
cPanel - Data Bases - MySQL Databases
YouTube Video Tutorials - cPanel MySQL Databases
The "cPanel MySQL Databases" YouTube video tutorials offer step-by-step guidance on creating and managing MySQL databases within cPanel. Viewers learn to set up new databases, manage users, and optimize database settings. This essential knowledge empowers users to efficiently handle their website's data and enhance overall performance.
Due to the method that cPanel stores MySQL database names, each underscore character requires two characters of that limit.
If you enable database prefixing, a database name may have a maximum of 63 characters, which includes the database prefix and the underscore character. Each additional underscore requires another two characters of that limit.
We suggest you do not use phpMyAdmin to create databases or database users. phpMyAdmin will not map databases, which can cause backups and restorations to not function properly.
We recommend that you use cPanel’s MySQL Database Wizard interface to create your first database and user.
Creating A Database
To add or delete information in existing databases, copy a database, or run MySQL queries and scripts, use cPanel’s phpMyAdmin interface
cPanel » Home » Databases » phpMyAdmin
To create a database, perform the following steps:
1) In the New Database text box, enter a name for the database.
2) Click Create Database. A new interface will appear.
3) Click Go Back. The new database appears in the Current Databases table.
To access and manage databases that you create, use the phpmyadmin feature.
For information visit the phpMyAdmin website.
Remote MySQL Host
Note: This section only appears if a Remote MySQL configuration exists.
This section provides the remote MySQL server’s address configured by your hosting provider. You can use this host to connect to the MySQL server.
Checking Your Databases
If you experience problems with a database, check your databases for errors.
To check a database for errors, perform the following steps:
1) In the Check Database menu, select the database that you wish to check.
2) Click Check Database. A new interface will appear, and the system will check whether the database functions correctly.
• If the system detects a problem in the database, it displays the name of the corrupt table.
• If the Check Complete message displays, the database functions correctly.
3) Click Go Back to return to the main interface.
Repairing A Database
If one of your databases becomes corrupt, you can attempt to repair it.
To repair a database, perform the following steps:
1) In the Repair Database menu, select the database that you wish to repair.
2) Click Repair Database. A new interface will appear, and the system will attempt to automatically repair the database.
• If the system cannot repair the database, it will attempt to determine the source of the corrupt data.
• If the Repair Complete message displays, the system successfully repaired the database.
3) Click Go Back to return to the main interface.
Current Databases
The Current Databases table lists the following information for each database in your account:
Database - The name of the database.
Size - The size of the database.
Privileged Users -The users who can manipulate the database.
When modifying a database user, make certain that you modify the user’s access to the correct database. Users may have access to more than one database.
• To remove a user from a database, click the trash can icon () for the desired user, and then click Revoke User Privileges from Database.
• To modify a user’s privileges for a specific database, click the desired username, select and deselect check-boxes to configure the desired privileges, and then click Make Changes.
Actions - The available actions for this database. Click the appropriate icon in this column to rename or delete a database.
Renaming a Database
It can be potentially dangerous to rename a MySQL database. We strongly recommend that you perform a backup of the MySQL database in cPanel’s Backup interface before you attempt to rename it.
When you rename a database, the system terminates all active connections to the database.
You must manually update configuration files and applications to use the new database name.
The system requires more time to rename larger and more complex databases.
To rename a database, perform the following steps:
1) In the Current Databases table, click Rename for the desired database.
2) Enter the new database name in the New name text box.
3) Click Proceed.
MySQL does not allow you to rename a database. When cPanel & WHM “renames” a database, the system performs the following steps:
1) The system creates a new database.
2) The system moves data from the old database to the new database.
3) The system recreates grants and stored code in the new database.
4) The system deletes the old database and its grants.
If any of the first three steps fail, the system returns an error and attempts to restore the database’s original state. If the restoration process fails, the API function’s error response describes these additional failures.
In rare cases, the system creates the second database successfully, but fails to delete the old database or grants.
The system treats the rename action as a success; however, the API function returns warnings that describe the failure to delete the old database or grants.
Deleting A Database
To delete a database, perform the following steps:
1) In the Current Databases table, click Delete for the desired database.
2) To permanently delete the database, click Delete Database.
3) Click Go Back to return to the main interface.
Adding MySQL Users
After you create a database, add users to the database and configure their privileges.
You should create the MySQL user accounts separately from mail and web administrator accounts.
You must create a user before you can add the user to an existing database.
To create a new user account, perform the following steps:
1) Enter a username in the Username text box.
Important: To learn more about database username limits, click your database type:
MySQL 5.6 - MySQL 5.7 - MariaDB
2) Enter and confirm the new password in the appropriate text boxes.
The system will evaluate the password that you enter on a scale of 100 points. 0 indicates a weak password, while 100 indicates a very secure password.
Some web hosts require a minimum password strength. A green Strength meter indicates that the password is equal to or greater than the required password strength.
3) Click Password Generator to generate a strong password. For more information, read our Password blog.
4) Click Create User.
5) Click Go Back to return to the main interface.
Adding Users To Databases
To add a user to a database, perform the following steps:
1) In the Add User To Database section of the interface, select the desired user and database from the menus.
2) Click Add. The MySQL Account Maintenance interface will appear.
3) Select the check boxe that correspond to the privileges that you wish to grant to the user.
4) Click Make Changes.
5) Click Go Back to return to the main interface.
For more information about user privileges, read the MySQL documentation.
Listing Current Users
The Current Users table lists all of your MySQL database users, and allows you to perform the following actions:
- • Change Password
Click to modify a database user’s password. Enter and confirm the desired password, and then click Change Password. - • Rename
Click to rename a database user. Enter the desired username, and then click Change Username. - • Delete
Click to permanently delete a database user, and then click Delete User to continue.
Related cPanel Tutorials and How To Guides
Over 75 different website hosting features available
Tweet Share Pin Email
Add Comment
This policy contains information about your privacy. By posting, you are declaring that you understand this policy:
- Your name, rating, website address, town, country, state and comment will be publicly displayed if entered.
- Aside from the data entered into these form fields, other stored data about your comment will include:
- Your IP address (not displayed)
- The time/date of your submission (displayed)
- Your email address will not be shared. It is collected for only two reasons:
- Administrative purposes, should a need to contact you arise.
- To inform you of new comments, should you subscribe to receive notifications.
- A cookie may be set on your computer. This is used to remember your inputs. It will expire by itself.
This policy is subject to change at any time and without notice.
These terms and conditions contain rules about posting comments. By submitting a comment, you agree with these rules:
- Although the administrator will attempt to moderate comments, not all comments can be moderated at all times.
- You acknowledge that all comments express the opinions of the original author and not those of the administrator.
- You will not post material which is knowingly false, obscene, hateful, threatening, harassing or invasive of privacy.
- The administrator has the right to edit, move or remove any comment for any reason and without notice.
Failure to comply with these rules may result in being banned from submitting further comments.
These terms and conditions are subject to change at any time and without notice.
 Essential Image WordPress Plugins
 Proper use of Categories and Tags with WordPress
 Why You Need Secure SSL WordPress Hosting
 Essential Slider WordPress Plugins
Comments