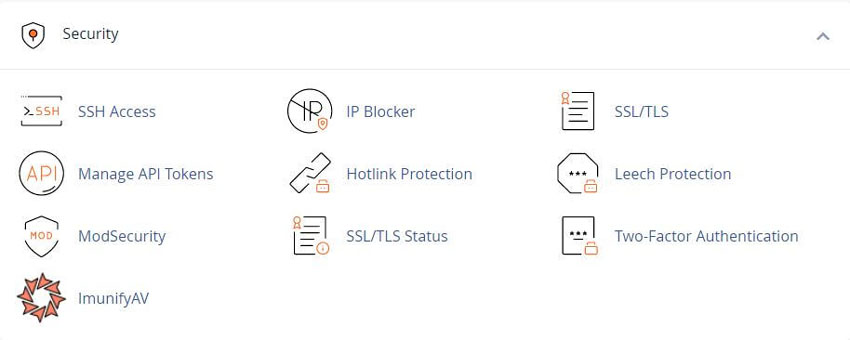
cPanel - Security - SSL/TLS
This will allow you to generate and manage SSL certificates, signing requests, and keys, which enhance your website security. Useful for websites that regularly work with sensitive information, such as login credentials and credit card numbers.
For more information on "Managing AutoSSL" see cPanel's AutoSSL
cPanel supports Transport Layer Security (TLS) protocol version 1.2 and Transport Layer Security (TLS) protocol version 1.3:
cPanel & WHM only supports TLSv1.2 or newer. The system enables TLSv1.2 by default.
Not all clients will support TLSv1.3, which requires OpenSSL 1.1.1 or higher.

Available features
This interface contains the following features:
- Default SSL/TLS Key Type - Select the type of key the system uses by default for SSL/TLS certificates and certificate signing requests
- Private Keys (KEY) - Generate, view, upload, or delete private keys
- Certificate Signing Requests (CSR) - Generate, view, or delete SSL certificate signing requests
- Certificates (CRT) - Set up an SSL certificate for the site
- Install and Manage SSL for your site (HTTPS) - Generate, view, upload, or delete SSL certificates
Default SSL/TLS Key Type
The Default SSL/TLS Key Type section of this interface lets you select a preferred default SSL/TLS key type. The system uses the selected key when it provisions all SSL/TLS certificates and signing requests. When you set a new default key type, this supersedes the server’s set default key type. For more information about the available key types, read the SSL/TLS Key Types documentation.
After you select a preferred key type, click Save to update your settings.
Private Keys (KEY)
When you set up an SSL certificate for your site, you must first add a private key. To access this interface, click Generate, view, upload, or delete your private keys.
This interface allows you to perform any of the following actions:
◦ Generate a new private key.
◦ Upload an existing private key.
◦ Edit a current private key.
◦ Remove a current private key.
You can generate a new key or upload an existing key through a *.key file.
Important: We strongly recommend that you save a copy of your private key in a safe location. You cannot recover a lost private key.
We strongly recommend that you use SSL certificates if your visitors submit sensitive information to your website.
Keys on Server
The Keys on Server table contains the following information:
| Column | Description |
|---|---|
| Description | The private key’s description. |
| ID | The private key’s ID. |
| Key Type | The type of private key. |
| Actions |
|
Generate a new private key
To generate a private key, perform the following steps:
1) Select the desired key from the Key Type menu. Optionally, in the Description text box, enter a brief description about this private key.
2) Click Generate. A new interface will appear that displays the requested key in an encoded and decoded format.
3) Copy the desired key.
4) Click Return to Private Keys. The new key displays in the Keys on Server table.
5) Upload the new key to the server. To do this, use either the paste a private key or browse for a private key methods.
Upload a new private key
Perform either of the following actions to upload a private key:
◦ Paste the key in the text box.
◦ Browse for the key.
Paste a private key
To paste a private key, perform the following steps:
1) Paste a key in the Paste the key into the following text box: text box.
2) Optionally, in the Description text box, enter a brief description about this private key.
3) Click Save to upload your private key. A new interface will appear that displays a success or failure message.
Browse for a private key
To browse for a private key, perform the following steps:
1) Click Choose File to upload a *.key file.
2) Optionally, in the Description text box, enter a brief description for this private key.
3) Click Upload. A new interface will appear that displays a success or failure message.
Delete a private key
To delete a private key, perform the following steps:
1) Locate the key that you wish to delete in the Keys on Server table.
2) Click Delete in the Actions column next to the key that you wish to remove. The system will redirect you to the Private Key interface.
3) Click Delete Key. A success or failure message will appear.
Edit and view details about a private key
To edit a key’s description or view a key, perform the following steps:
1) Locate the key that you wish to edit in the Keys on Server table.
2) Click View & Edit in the Actions column next to the key that you wish to edit. A new interface will appear that displays the description, the encoded private key, and the decoded private key.
3) Edit the Description text box.
4) Click Update. A success or failure message will appear next to the Description text box.
Certificate Signing Requests (CSR)
This interface allows you to generate, view, or delete a certificate signing request (CSR). You can also view and edit current descriptions and encoded private keys and decoded private keys.
To access this interface, click Generate, view, or delete SSL certificate signing requests.
Certificate Signing Requests on Server
The Certificate Signing Requests on Server table contains the following information:
| Column | Description |
|---|---|
| Domains | The CSR’s domain. |
| Created | The time that you created the CSR, in Universal Time, Coordinated (UTC). |
| Description | The CSR’s description. |
| Actions |
|
Generate a new CSR
Warning: You must have or generate a key before you generate a signing request.
To generate a CSR, perform the following steps:
1) Under the Generate a New Certificate Signing Request (CSR) heading, select the key from the Key menu.
◦ When you select a key, the Edit option appears. Click Edit to view and edit the information for your private key.
◦ If the desired key does not appear in the menu, select the type of key you wish to generate from the Key menu. You can also add a new private key to the Private Key section of the interface.
2) Enter the required information in the text boxes below the Key menu.
3) Click Generate.
Note: Your hosting provider may require additional information.
Delete a CSR
To delete a CSR, perform the following steps:
1) Locate the CSR that you wish to delete in the Certificate Signing Requests on Server table.
2) Click Delete in the Actions column. A new interface will appear.
3) Click Delete CSR to confirm.
◦ A message of success or failure will appear.
4) If you do not wish to delete the CSR, click Cancel.
Edit and view details about a CSR
To edit a description or view a CSR, perform the following steps:
1) Locate the CSR that you with to edit in the Certificate Signing Requests on Server table.
2) Click Edit in the Actions column. A new interface will appear that displays the description, the encoded CSR, and the decoded CSR.
3) Enter any desired changes in the Description text box.
4) Click Update Name. A message of success or failure will appear next to the Description text box.
Certificates (CRT)
This interface allows you to generate, view, upload, or delete SSL certificates. To access this interface, click Generate, view, upload, or delete SSL certificates.
Certificates on Server
The Certificates on Server table contains the following information:
| Column | Description |
|---|---|
| Domains | The private key’s description. |
| Issuer | The Certificate Authority (CA) that issues the certificate. |
| Expiration | The time that the certificate expires, in Universal Time, Coordinated (UTC). |
| Key Type | The type of private key. |
| Description | The certificate’s description. |
| Actions |
|
Upload a New Certificate
To paste a certificate, perform the following steps:
1) Under the Upload a New Certificate heading, paste the text of the certificate in Paste the certificate into the following text box: text box.
2) Optionally, in the Description: text box, enter a brief description for this certificate.
3) Click Save Certificate to upload your certificate.
4) A success or error message will appear on a new screen.
To browse for a certificate, perform the following steps:
1) Under the Choose a certificate file (.crt)* heading, click Choose File.
2) Optionally, in the Description: text box, write a brief description about this certificate.
3) Click Upload Certificate.
4) A success or error message will appear.
Generate a New Certificate
To generate a self-signed SSL certificate, perform the following steps:
1) Under the Generate a New Certificate heading, select the key from the Key menu. If the desired key does not appear in the menu, use the Private Keys feature to add a new private key.
2) Enter the appropriate information in the Domains, City, State, Company, Company Division, Email, and Description text boxes and the Country menu. You must enter the Domains, City, State, Country, and Company information.
3) Click Generate.
Important: We reserve self-signed certificates for intranet uses. To secure a public website, we recommend that you purchase and install a certificate from a trusted CA.
Delete a certificate
To delete a certificate, perform the following steps:
1) Locate the certificate that you wish to delete in the Certificates on Server table.
2) Click Delete for that certificate. A new interface will appear.
3) Click Delete Certificates. A success or error message will appear.
Edit and view details about a certificate
To edit a description or view a certificate, perform the following steps:
1) Locate the certificate that you wish to edit in the Certificates on Server table.
2) Click Edit. A new interface will appear that displays the description, the encoded certificate, and the decoded certificate.
3) In the Description: text box, enter your changes, and then click Update Description. A success or error message will appear.
To delete the certificate from this interface, click Delete Certificate at the bottom of the interface.
Install and Manage a Certificate
To install a certificate, click Install in the Actions column under the Certificates on Server heading.
Warnings: Mail SNI is not compatible with Webmail and will not function for any Webmail connection. Webmail connections use the cPanel service SSL certificate.
The Manage Installed SSL Websites table
If a SSL certificate already exists on a domain with a dedicated IP address, the interface displays the Manage Installed SSL Websites table below the introductory text.
| Column | Description |
|---|---|
| FQDN | The website’s domain name. |
| Certificate Expiration | The date when the certificate expires. |
| Document Root | The location of the domain’s website files. |
| Actions | You can perform the following actions:
|
Install an SSL Website
Use the form in the Install an SSL Website section to install a certificate.
You can use three different methods to install a certificate:
◦ Click Browse Certificates.
◦ Search by domain.
◦ Manually enter the information.
Browse Certificates
To use Browse Certificates to install a certificate, perform the following steps:
1) Click Browse Certificates.
2) Click the button that corresponds to the desired certificate. Only certificates that correspond to a domain appear in the list.
3) Click Use Certificate to return to the Install an SSL Host section. The certificate’s information will appear in the text boxes.
4) Optionally, enter the appropriate information in the Certificate Authority Bundle: (CABUNDLE) text box.
5) Click Install Certificate. A success or failure message will appear.
Search by Domain Name
To search by domain to install a certificate, perform the following steps:
1) Select the desired domain in the Domain menu.
2) Click Autofill by Domain. The interface will attempt to retrieve and enter the certificate information.
◦ If this step succeeds, the available text boxes will contain the appropriate information.
◦ If this step does not succeed, the text boxes will remain empty.
3) Click Install Certificate. A success or failure message will appear.
Manually enter information
To manually enter the information to install a certificate, perform the following steps:
1) Select the desired domain in the Domain menu.
2) Enter the certificate information in the Certificate (CRT) text box.
3) Enter the private key information in the Private Key (KEY) text box.
4) Optionally, enter the certificate authority information in the Certificate Authority Bundle (CABUNDLE) text box.
5) Click Install Certificate. A success or failure message will appear.
Listing Softaculous Apps Collection More than 30 scripts from Form Tools and chat to genealogy or finances and more
Related cPanel Tutorials and How To Guides
A huge volume of features and customization that is available with cPanel
Tweet Share Pin Email
Add Comment
This policy contains information about your privacy. By posting, you are declaring that you understand this policy:
- Your name, rating, website address, town, country, state and comment will be publicly displayed if entered.
- Aside from the data entered into these form fields, other stored data about your comment will include:
- Your IP address (not displayed)
- The time/date of your submission (displayed)
- Your email address will not be shared. It is collected for only two reasons:
- Administrative purposes, should a need to contact you arise.
- To inform you of new comments, should you subscribe to receive notifications.
- A cookie may be set on your computer. This is used to remember your inputs. It will expire by itself.
This policy is subject to change at any time and without notice.
These terms and conditions contain rules about posting comments. By submitting a comment, you agree with these rules:
- Although the administrator will attempt to moderate comments, not all comments can be moderated at all times.
- You acknowledge that all comments express the opinions of the original author and not those of the administrator.
- You will not post material which is knowingly false, obscene, hateful, threatening, harassing or invasive of privacy.
- The administrator has the right to edit, move or remove any comment for any reason and without notice.
Failure to comply with these rules may result in being banned from submitting further comments.
These terms and conditions are subject to change at any time and without notice.
 Ultimate Guide for The Best Django Resources, Tutorials, Videos
 Best Hosting Review Websites - Why They Can not Be Trusted
 Ultimate Guide for The Best Drupal Resources and Tools
 Ultimate Guide for The Best Joomla Resources and Tools
Comments