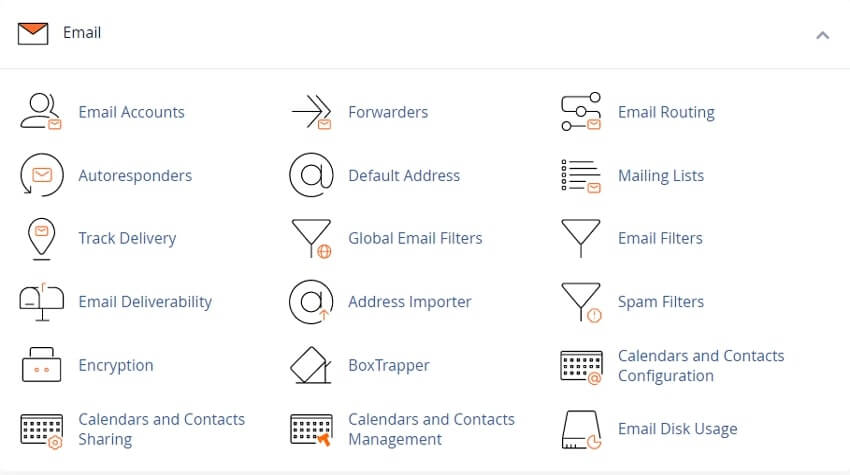
cPanel - Email - Calendar & Contact Configuration
This document explains how to configure calendars and contacts using CalDAV and CardDAV on Apple® and Linux® desktop systems, as well as on Apple mobile devices
How to Set Up Calendars and Contacts
Setting Up CalDAV and CardDAV for cPanel Calendars and Contacts
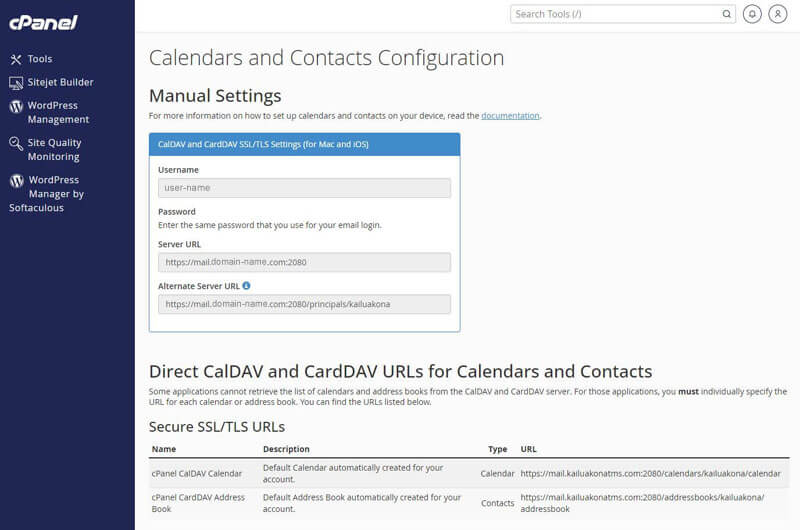
You can configure your cPanel calendars (CalDAV) and contacts (CardDAV) using the Webmail » Calendars and Contacts Configuration interface.
Here, you'll find all the necessary setup details, including:
- Username: "user@example.com
- Password: Use your Webmail login password
- Server URL: "https://example.com:2080"
- Alternate Server URL: "https://example.com:2080/principals/user@example.com/"
Note: Some apps don’t support Autodiscover. If the Server URL fails, use the Alternate Server URL instead.
You can also access individual calendar and contact URLs in the Direct CalDAV and CardDAV URLs for Calendars and Contacts section:
- Calendar: "https://example.com:2080/calendars/user@example.com/calendar"
- Address Book: "https://example.com:2080/addressbooks/user@example.com/addressbook:"
To simplify setup, you can have Webmail send you configuration scripts. Refer to Set up email on your device in the *Webmail Interface documentation*.
Configuration Instructions by Platform
iOS®
Note: If your server uses a self-signed SSL certificate:
- You may see a warning that the server identity can't be verified. Tap Continue to proceed.
- The Reminders app won’t work with these calendars.
Access Setup Screen:
1. Go to Settings > Mail > Accounts > Add Account > Other
2. Choose:
- Add CalDAV Account under *Calendars*
- Add CardDAV Account under *Contacts*
Enter Account Info:
- Server: "example.com:2080" *(include ":2080")*
- Username: "user@example.com"
- Password: Your Webmail password
- Description: e.g., *My Calendar Account*
3. Tap Next, enable Calendars or Contacts
4. Tap Keep on My iPhone or Delete, then Save
macOS®
Access Configuration Menu:
1. Open Launchpad > System Settings > Internet Accounts
2. Click Add Other Account…
3. Select CalDAV Account or CardDAV Account
Setup Options:
Automatic
Not supported for CardDAV or if using self-signed certificates
- Choose Automatic
- Enter your email and password
- Click Sign In
Manual
- Choose Manual
- Username: "user@example.com"
- Password: Your Webmail password
- Server Address: "example.com:2080" *(include ":2080")*
- Click Sign In
Advanced
- Choose Advanced
- Username / Password as above
- Server Address: "example.com"
- Server Path: Use paths from Webmail (e.g., "/calendars/user@example.com/calendar")
- Port: "2080"
- Click Sign In
Linux (Thunderbird Recommended)
Set Up Calendars:
1. Open Calendars in Thunderbird
2. Click New Calendar > On the Network > Next
3. Fill in:
- Username: "user@example.com"
- Location: "https://example.com:2080" *(must include ":2080")*
4. Click Find Calendars, enter your password when prompted
5. Ensure CalDAV and the correct calendar are selected
6. Click Subscribe
Set Up Contacts:
1. Open Address Book
2. Click Create New Address Book > Add CardDAV Address Book
3. Fill in:
- Username: "user@example.com"
- Location: "https://example.com:2080"
4. Click Continue, enter your password when prompted
5. Make sure the cPanel CardDAV Address Book is selected
6. Click Continue
Watch our video about cPanel Hosting Services on YouTube
Related cPanel Tutorials and How To Guides
Tips and tricks on how to better optimize your cPanel
Tweet Share Pin Email
Add Comment
This policy contains information about your privacy. By posting, you are declaring that you understand this policy:
- Your name, rating, website address, town, country, state and comment will be publicly displayed if entered.
- Aside from the data entered into these form fields, other stored data about your comment will include:
- Your IP address (not displayed)
- The time/date of your submission (displayed)
- Your email address will not be shared. It is collected for only two reasons:
- Administrative purposes, should a need to contact you arise.
- To inform you of new comments, should you subscribe to receive notifications.
- A cookie may be set on your computer. This is used to remember your inputs. It will expire by itself.
This policy is subject to change at any time and without notice.
These terms and conditions contain rules about posting comments. By submitting a comment, you agree with these rules:
- Although the administrator will attempt to moderate comments, not all comments can be moderated at all times.
- You acknowledge that all comments express the opinions of the original author and not those of the administrator.
- You will not post material which is knowingly false, obscene, hateful, threatening, harassing or invasive of privacy.
- The administrator has the right to edit, move or remove any comment for any reason and without notice.
Failure to comply with these rules may result in being banned from submitting further comments.
These terms and conditions are subject to change at any time and without notice.
 AI Automation Ideas
 How AI Improves Landing Page
 AI Image and Graphic Tools
 Best Logo Makers
Comments