cPanel - Files - File Manager
The File Manager enables you to administrate your website files directly with an intuitive user interface. Enabling easy file organization.
YouTube Video Tutorials - cPanel File Manager
The "cPanel File Manager" YouTube video tutorials provide a comprehensive overview of navigating and using the File Manager tool in cPanel. Viewers learn how to upload, organize, and edit files, manage permissions, and create backups. These essential skills help users efficiently manage their website files and streamline their hosting experience.
The File Manager
Upload, download, create, copy, move, update, edit, view, extract, compress, password protect, search, delete, restore
Files, images or folders
Note: Whenever you access a folder that contains a Git™ repository, we bly recommend that you do not update any files or directories. Changes could cause serious problems with the repository, regardless of whether you created it in the git version control interface.
When a toolbar action isn’t available, the icon displays in gray.
You can only use certain File Manager actions with one file at a time.
Select the desired file before you attempt these actions.
Any attempt to rename, edit, or view multiple files at the same time will only affect the first listed file in the folder.
How to Add Modify View Delete Manage files with your cPanel account using the File Manager
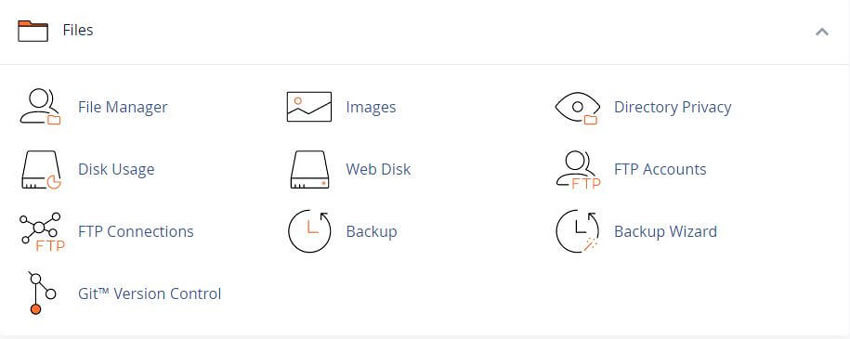
Log into your cPanel account
Navigate to "Files" section - "File Manager" menu
You will be taken /home/user directory by default. Feel free to change the default directory in the Settings menu:
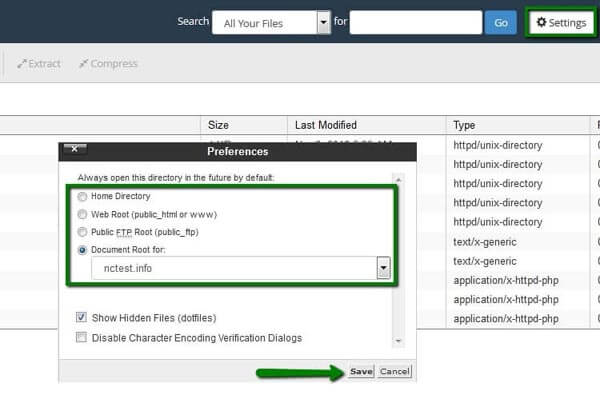
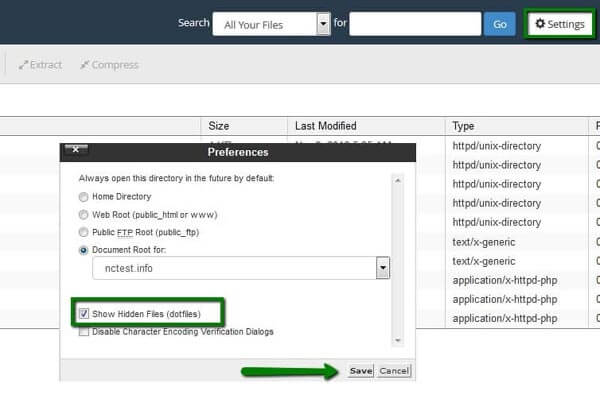
Here, you can also enable "Show Hidden Files" option.
With this option, System files such as the .htaccess will be displayed in File Manager as well.
The "public_html" folder
The "public_html" folder is the web root for your primary domain name.
This means that the "public_html" is the folder where you put all website files which you want to appear when someone types your Domain Name.
If you wish to upload files, for example an addon domain, you will need to move into the "/public_html/youraddondomain" directory.
The interface of File Manager is divided into 4 sections:
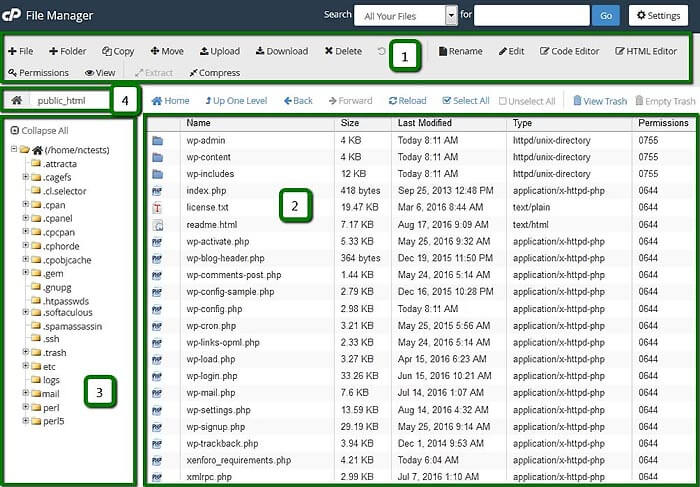
1 The File Manager Toolbar
In the first section, you can find a toolbar with all the basic functions for managing files such as creating a new folder, deleting a file, upload-download and much more.
2 The File Window
The second is the file listing section, it displays the content of the selected directory. If no files or folders are created, the following message will be displayed in the file window This directory is an empty message.
3 The Navigation Toolbar
The navigation toolbar section allows navigating between folders in the file window.
4 Current Location Window
The location section shows the directory you are currently located in.
To Upload a File
![]()
Open the File Manager
Navigate to the folder you wish to upload the file(s) to
Click on the Upload icon
Click Select File and locate the file on your local machine
Select the file and click on Open/Choose
Or simply drag and drop the needed file from your local machine to the upload window.

To Copy or Move a File
![]()
Open the File Manager
Select the file(s) you wish to copy/move
After the needed items are selected, click the Copy or Move icon
Or by right-clicking on the selected file(s) and choose Copy or Move option from the drop-down menu
Once done, the confirmation window with the final destination will pop up.

To Create a New File
![]()
Open the File Manager
Navigate to the folder where you wish to create a file
Click on +File icon – a new pop-up box will appear to enter the name of the file you wish to be created.
Click the Create New File

To Delete a File
![]()
Open the File Manager
Navigate to the folder where the file(s) you wish to delete is located
Select the file(s) and hit the Delete icon
Or right-click on the file and use the Delete option from the drop-down menu
Once done, the confirmation window will pop up
The deleted files are moved to the system trash folder
If you wish to remove the file(s) permanently, check-mark Skip the trash and permanently delete the files option.

NOTE: The files are stored in the trash folder for 90 days. After 90 days, they are removed from the Server automatically.
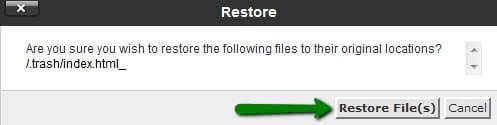
To Restore a File
![]()
Open the File Manager
Navigate to the trash folder in /home/user/ directory
Select the needed file(s) and hit the Restore icon
Or right-click on the file and use the Restore option from the drop-down menu
Once done, the confirmation window will pop up.
To Edit a File
![]()
Open the File Manager
Select the file you wish to edit and hit one of the Edit icons
Or right-click on the file and use Edit/Code Edit/HTML Editor from the drop-down menu
Choose one of the three following editors from the pop-up menu:
Warning: If you select the wrong initial encoding, your file may become corrupt. If your file displays as a series of special characters, immediately abort your action and select the correct encoding. Do not save the file.
Edit: this editor will edit a document as plain text
Code Editor: this editor will edit a document as code and give line numbers down the side of the editor. You can highlight your code with color by using the syntax drop-down menu and selecting the code you are working with
HTML Editor: The editor will let you edit a document as an HTML document. In this editor, you can also switch between design view, (as a text document). Source view (through the html code itself). Or a preview mode, (view the page through the web) by selecting the appropriate tab in the bottom left of the editor.
To Compress a File
![]()
It is useful to store a group of files in one file for an easy backup or for a transfer to another directory, as well as compress large files. Compressed files take up less disk space and are downloaded faster via the Internet. The data can be compressed into a single *.zip, *.Gz, or *.Bz2 archive
Open the File Manager
Select the files/directories you wish to compress and hit the Compress icon
Define Compression Type and enter the name of the archive
Once done, hit Compress File(s).

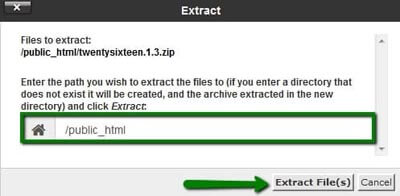
To Extract a File
![]()
Open the File Manager
Select the file you wish to uncompress
Hit Extract icon
Or right-click on the file and use the Extract option
Define the path you wish to extract the file to
Once done, hit Extract File(s)
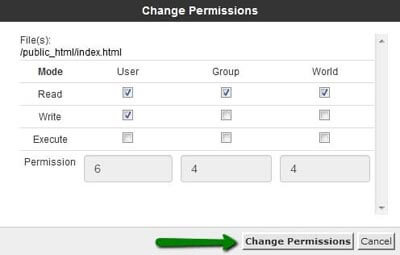
To change Permissions for a File
![]()
Open the File Manager
Select the file/folder you wish to change permissions for and hit the Permissions icon
Or right-click on the file/folder and use the Change Permissions option from the drop-down menu
Set the needed value and hit Change Permissions.
Search for an item
The Search text box at the top-right corner of the interface allows users to search for a specific file. By default, the Search text box searches all files in the home folder. You can limit the search to the document root at /home/user/public_html, where user represents your cPanel username. You can also limit the search to the folder in the interface.
To search for a file, perform the following steps:
Use the Search menu to select the folder to search. You can select from the following options:
◦ All Your Files
◦ only public_html
◦ Current Directory
Enter the desired file name in the text box.
Click Go.
A new interface displays the filenames that match your search.
To go to a folder, or go to the folder that contains the file, double-click the desired item in the list.
If no files that include your search term exist, a No records found message appears.
Other item actions
Right-click on files or folder icons and a pop up menu of actions that the system customizes based on the file’s type.
| Feature | Displays for | Description |
|---|---|---|
| Upload | Files | Upload individual itis, such as files or images. Note: You cannot upload a folder through this interface. Create a new folder and upload the desired files into it. |
| Download | Files | Download files to save thi locally. |
| Rename | Files, Compressed Files, Folders | Rename the file or folder. |
| Edit | Files | Open the selected file in an editor. Warning: You cannot edit a file in this interface if it contains more than one megabyte (1 MB) of data. To edit the file, you must download it and use a local editor. |
| HTML Editor | Files | Open the selected HTML file in a visual HTML editor. Warning: You cannot edit a file in this interface if it contains more than one megabyte (1 MB) of data. To edit the file, you must download it and use a local editor. |
| View | Files | View the contents of the selected file. |
| Extract | Compressed Files | Extract the selected *.zip, *.Gz, or *.Bz2 archive and store the files in a folder. |
| Compress | Files, Compressed Files, Folders | Compress the selected files or folders to a single *.zip, *.Gz, or *.Bz2 archive and store the compressed file to a specified folder. |
| Password Protect | Folders | Set a username and password to restrict access to a folder. Note: Your hosting provider must enable this feature. |
| Leech Protection | Folders | Redirect users who have shared the password to a restricted area of your site. The system will redirect accounts that exceed a set number of logins in a two hour period to a selected URL, or receive an internal server error message. Note: Your hosting provider must enable this feature. |
| Manage Indexes | Folders | Customize the way users view a folder on the web. Note: Your hosting provider must enable this feature. |
See our cPanel WHMCS Knowledgebase Articles. Boost Support & Save Time
Related cPanel Tutorials and How To Guides
Wide range of key features crucial for website management
Tweet Share Pin Email
Add Comment
This policy contains information about your privacy. By posting, you are declaring that you understand this policy:
- Your name, rating, website address, town, country, state and comment will be publicly displayed if entered.
- Aside from the data entered into these form fields, other stored data about your comment will include:
- Your IP address (not displayed)
- The time/date of your submission (displayed)
- Your email address will not be shared. It is collected for only two reasons:
- Administrative purposes, should a need to contact you arise.
- To inform you of new comments, should you subscribe to receive notifications.
- A cookie may be set on your computer. This is used to remember your inputs. It will expire by itself.
This policy is subject to change at any time and without notice.
These terms and conditions contain rules about posting comments. By submitting a comment, you agree with these rules:
- Although the administrator will attempt to moderate comments, not all comments can be moderated at all times.
- You acknowledge that all comments express the opinions of the original author and not those of the administrator.
- You will not post material which is knowingly false, obscene, hateful, threatening, harassing or invasive of privacy.
- The administrator has the right to edit, move or remove any comment for any reason and without notice.
Failure to comply with these rules may result in being banned from submitting further comments.
These terms and conditions are subject to change at any time and without notice.
 Why Do I Need A Secure HTTPS Website
 The Best WordPress Learning Resources
 Common Business Blogging Mistakes To Avoid
 My Domain Name is taken - What can I do
Comments